 Creating a basic stage
|
Command |
Path |
|
Create Stage |
Event Design |
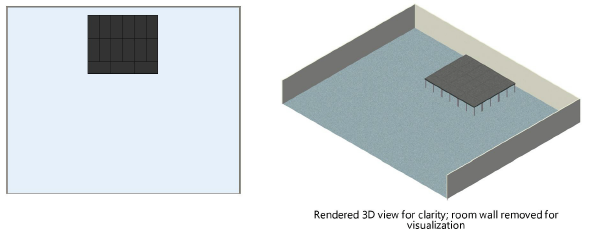
Many event rooms contain a stage for viewing presentations. Based on the Stage Deck and Stage Plug tools, a stage is automatically created according to specified parameters. The required number, size, and type of stage objects automatically fill the designated area. For more customizable options, see Inserting stage structures.
To create the stage area:
Create a closed 2D object (such as a rectangle, polyline, or polygon) to represent the stage. The dimensions of the object should match the dimensions of the stage to be created.
With the 2D object selected, select the command.
The Create Stage dialog box opens. Specify the stage properties and attributes.
Click to show/hide the parameters.Click to show/hide the parameters.
|
Parameter |
Description |
|
Stage Height |
Specifies the overall stage height |
|
Standard Stage Deck Width/Depth |
Specifies the dimensions of a rectangular stage |
|
Structure |
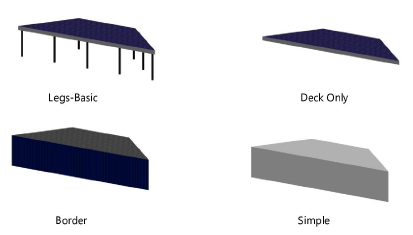
Select the type of stage construction; stage plug objects are shown as an example
|
|
Top Thickness |
For Legs-Basic and Deck Only stages, sets the thickness of the deck |
|
Trim Height |
For Legs-Basic and Deck Only stages, sets the height of the trim around the stage |
|
Leg Diameter |
For Legs-Basic, sets the diameter of the leg supports |
|
Leg Profile |
For Legs-Basic, select a round, square, or octagonal shape for the legs |
|
Leg Reference Spacing |
For Legs-Basic, sets an approximate spacing value for the legs; the exact spacing is determined automatically by evenly dividing the length of the deck |
|
Minimize Leg Count |
When multiple stages fill an area, removes unnecessary legs from Legs-Basic structures that are supported by adjacent stages |
|
Add Casters |
For Legs-Basic, adds casters to the legs to create a rolling platform |
|
Object Class |
To control appearance and visibility, select a class from the list of classes present in the drawing, or create a new class |
|
Purpose/Set Cart ID/Note |
Enter information about the stage which can be placed on the drawing with the Text Options from the Object Info palette of each individual stage object (does not affect the stage appearance) |
|
Fill Color |
Sets the fill color for the stage |
|
Pen Color |
Sets the pen color for the stage |
|
Specifies the appearance of applicable deck elements in 3D views. The 3D Options dialog box opens. For each available portion of the stage, either select the color from the Color list, or select Custom Texture and then click the current custom texture to open the Resource Selector; double-click a resource to select it. The Object Info palette displays the color or texture selections in the relevant section. The appearance of Simple stage decks is set from the Attributes palette. |
If the area is rectangular, stage decks are inserted; otherwise, a combination of stage deck and/or stage plug objects are inserted.

Individual stage parameters can be edited in the Object Info palette; see Inserting a stage deck and Inserting a stage plug.

